Monday, October 15, 2012

Hampton's Style Chair Makeover

Okay, so I went a little crazy on the chair makeovers this weekend. This was another chair that was in great condition that was given to me. I liked the structure and the shape of the back, but hated the colors. I knew that this chair would look awesome in a bright color with a new seat.

Here's the before:
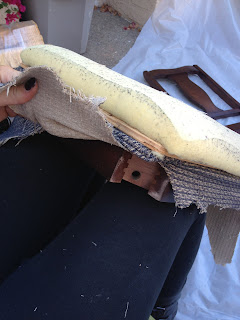
I started by taking the seat off of the chair. I had to flip it over and unscrew it from the bottom. The fabric covering the seat was glued on, but I could feel wood and a cushion underneath. I just went for it and cut the fabric right off. The cushion and wood separated easily.


After the seat was removed, I took the entire chair apart and cleaned the wood and spread all of the pieces out on a great plastic wrap I picked up from Joanne's Fabric. It's reusable and great for messy projects. I used a professional mint colored spray paint with a primer included. I chose a matte paint incase I later wanted to distress the paint a bit. 


I used a spray mount with a dark brown striped fabric to reupholster the seat. I loved the contrast of the brown and mint. It's masculin, yet feminine. It has a very Hampton's like feel...I was inspired to make this chair after a few visits to the Fairmont Hotel's newest club Bungalow in Santa Monica. The interior/exterior is completely like a Polo meets Ralph Lauren beach bungalow. 


Saturday, October 13, 2012

Purple Damask Chair Makeover

This old, broken and dirty chair was given to me instead of the dumpster at work! It was completely unstable and rather gross looking to begin with. My first step was to get a new screw and make sure the chair was functional before beginning with the paint. 

Once the chair was fixed and sturdy enough to actually sit in, I knew I wanted to reuse it. The lines were simple and the seat looked easy to reupholster. 

I began by removing the seat and cleaning the wood of all dirt and dust. You always want to make sure you are working with clean pieces when spray painting so the paint looks even. 


I picked a professional spray paint with a primer included to save time. I took my time letting each coat dry completely before spraying another. This step is super important when spray painting so that the paint does not build up and cause a drip. This has happen to me in the past and it looks sloppy and messy. Take your time! 


While I was waiting for the paint to dry I reupholstered the actual seat. It had a cover on it already, so I removed the staples and wiped it down. Then I put the cushion face down on my fabric of choice. I cut the fabric around the cushion in the shape of the seat leaving a 2" border. I then sprayed the back of the seat with spray mount around the border so that I could fold the left over fabric around the bottom. Make sure to pull tight and that there are no creases or wrinkles in the fabric on the top of the seat. The tighter you can secure the fabric to the bottom of the seat, the better. 


Once the paint on the wood was completely dry, I resembled the seat and voila! This chair has been reused, repurposed, and is now in fabulous condition. It's so fun to mix neutrals with pops of color. It's unexpected, fun, and multifunctional. It now works great as a vanity chair, or even as a simple statement piece for any room.